LAB NOTES: Homemade Oat Flour Sandwich Bread
Hello all,
Wayne, AKA the Mad Food Scientist here.
I recently decided to jump back into baking. I found this video.
https://www.youtube.com/watch?v=v_OkBy9REAI on John Kirkwood’s YouTube channel.
John is a retired cook from England and has tonnes of interesting videos.
Here’s the link to the written recipe.
https://profoodhomemade.com/two-hour-loaf/
However, I got to wondering if I could tweak this a bit more.
I decided to reduce the amount of AP flour that I put in and substitute in some homemade oat flour.
I may have to increase the water used in the dough.
ORIGINAL:
450g / 16oz Strong white bread flour
270g / 270mls Lukewarm water / 40°C / 104°F
15g / ½oz Soft butter
7g / 2tsp Instant dried yeast
6g / 1tsp Sugar
8g / 1tsp Salt
METHOD:
Place all of the ingredients into your stand mixer bowl, and using the dough hook, knead for 10 minutes.
If you are kneading this recipe by hand, add all of the ingredients to a bowl and partially mix it all together, tip it out onto your worktop and knead the dough for 10 minutes, then carry on with recipe.
Turn out the dough from the mixer and form it into a ball, place it into a lightly oiled bowl, cover the bowl and let it rise for at a minimum of 30 minutes, the dough should double in size (this may take longer depending on the temperature of your kitchen) if you can, proof your dough in the oven, with just the light bulb on.
Grease a 2lb / 900g loaf tin, see video for tin dimensions.
After the 30 minutes, turn out the risen dough onto a non-floured surface, and knock the dough back, this simply means force all of the gas out of it.
Form the dough into a sausage shape, and place it in the greased loaf tin, firmly pressing it down to fill in any gaps in the sides and corners.
Lightly flour the top of the dough, then cover it with a dry light weight cloth, and allow it to proof until it has risen approximately 6cm / 2½ inches, over the top of the tin, this should take approx, 30 minutes.
When you think there is only 5 minutes left on the proof time, preheat your oven to 180°C / 355°F / Gas Mark 4.
Once the dough has fully risen, sprinkle on a little flour, and get it into the preheated oven, and set your timer for 25 minutes.
After the 25 minutes, remove it from the oven, immediately take it out of the tin, and place it back in the oven, and increase the temperature to 200°C / 390°F / Gas mark 6, bake for a further3 minutes.
Remove from the oven, allow it to cool on a wire rack, before slicing and serving.
Enjoy.
LAB NOTES:
INGREDIENTS:
270g / 9.5oz All Purpose Flour
120g/4.2oz Homemade Oat Flour
270g / 270mls Lukewarm water / 40°C / 104°F
15g / ½oz Soft butter
7g / 2tsp Instant dried yeast
6g / 1tsp Sugar
8g / 1tsp Salt
METHOD:
Place all of the ingredients into your stand mixer bowl, and using the dough hook, knead for 10 minutes.
John Kirkwood says, that if you are kneading this recipe by hand, add all of the ingredients to a bowl and partially mix it all together, tip it out onto your worktop and knead the dough for 10 minutes, then carry on with recipe.
Turn out the dough from the mixer and form it into a ball, place it into a lightly oiled bowl, cover the bowl and let it rise for at a minimum of 30 minutes, the dough should double in size (this may take longer depending on the temperature of your kitchen) if you can, proof your dough in the oven, with just the light bulb on.
Line a 2lb / 900g loaf tin with parchment paper.
After the 30 minutes, knock the dough back, this simply means force all of the gas out of it.
Put the dough ball back in the oiled bowl, cover and let rise again for 30 minutes.
Punch the dough back down.
Form the dough into a sausage shape, and place it in the parchment paper lined loaf tin, firmly pressing it down to fill in any gaps in the sides and corners.
Lightly flour the top of the dough, then cover it with a dry light weight cloth, and allow it to proof until it has risen approximately 6cm / 2½ inches, over the top of the tin, this should take approximately, 30 minutes.
When you think there is only 5 minutes left on the proof time, preheat your oven to 180°C / 355°F / Gas Mark 4.
Once the dough has fully risen, sprinkle on a little flour, and get it into the preheated oven, and set your timer for 25 minutes.
After the 25 minutes, remove it from the oven, immediately take it out of the tin, and place it back in the oven, and increase the temperature to 200°C / 390°F, bake for a further 3 minutes. Remove from the oven, allow it to cool on a wire rack, before slicing and serving.
Enjoy.
OBSERVATIONS:
As noted above I substituted in 120g of homemade Oat flour for 180g of the usual 450g of flour used in the original recipe..
I didn’t turn the dough out onto a floured surface. I took it right from the bowl, formed it into
a ball and then put it in the bowl with oil and made sure it was coated. I covered it and let it rise for thirty minutes.
Then I punched it down, put it back in the bowl and let it rise for another thirty minutes.
When time was up I lined my cast iron bread pan with parchment paper. punched down the dough again, and shaped it into a sausage shape.
I put it in the bread pan and made sure to spread it to fill the whole pan.
I let it do final rise covered for another 30 minutes.
I put it in my preheated airfryer at 180C/355F for twenty five minutes.
Then when the timer went off, I took the loaf out of the pan and put the loaf and parchment paper in the airfryer at 200C/390F for three minutes.
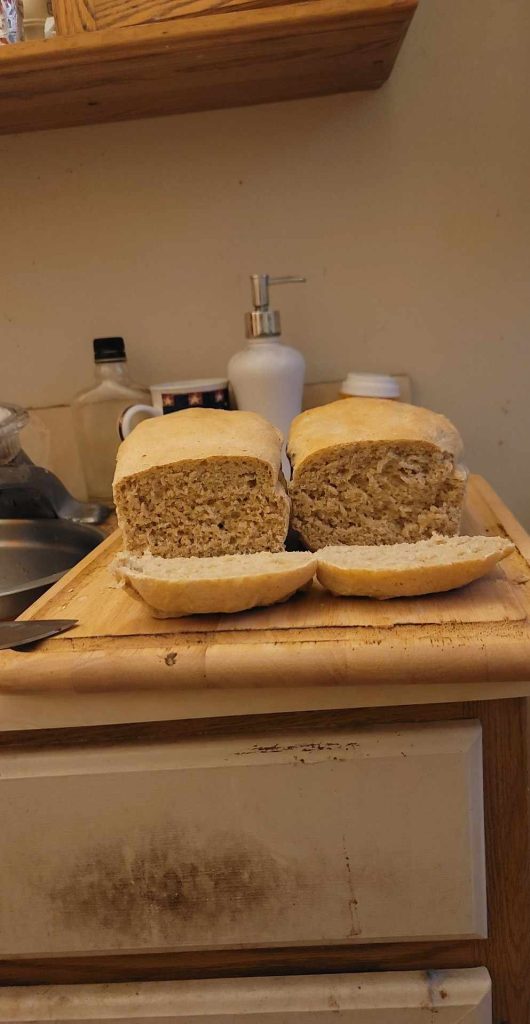
Then it was placed on a wire rack to cool. I decided to make two loaves to get me through the week’s worth of lunches for work.
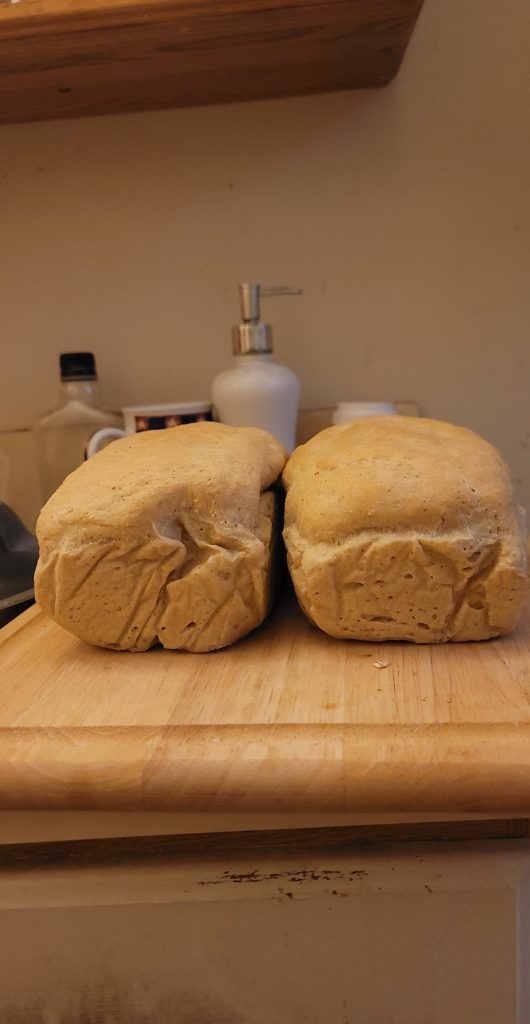
After it had cooled I took some photos, including some shots trying to show it’s crumb.
Which had the added benefit of letting me taste the bread. It tasted awesome!
My philosophy in the Domestic Culinary Lab is ( Clean version ) Fool Around And Find Out!!